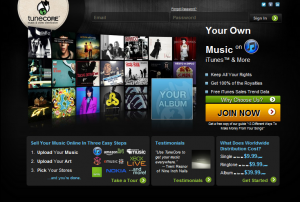
There is just no excuse , this is the age of the Indie Artist.
There is just no excuse , this is the age of the Indie Artist.

Calibrating your DAW for latency is an increidibly important first step not to be forgotten. Depending on your audio interface and computer setup the latency i.e. delay between what you play and what is recorded can be significant. Furthermore, if you are not aware of the issue it can really be disconcerting since it will seem like you have timing issues.
On Windows reduced latency is achieved by using ASIO drivers. Once you have an ASIO driver installed the next step is to determine what the lowest buffer setting is where your interface still operates normally. Abnormal operation is discernible due to audible pops, clicks and glitches. The lower your buffer setting the lower your latency but having low latency is still not enough with regards to recording. The goal is to actually “zero off” latency i.e. calibrate your DAW so that an a sample size offset is specified so that there is no latency at all.
So how do you do that? Well, you conduct an experiment which is known as a loop back test. I learned about how to set this up from a thread I started at the Reaper forum.
These are the steps:
If using Reaper there’s a project file availble in the thread I have a link for above. The thread has some interesting discussions on latency and is a good read. Check it out.

Here is one I hope of many experiments that I will share in making the right bass sound for whatever the occassion may be.
First of all, I started by using the Pandora PX4D and specifically the Slap Bass patch. I made sure to remove any effects processing since I was going to be doing that on my DAW i.e. Reaper in this case.
As far as to the effects the first VST effect I used was a guitar effect the RedNefTwin from SimulAnalog. Here is a screen shot of the settings used:

The second effect is the free Classic Compressor by Kjaerhus Audio. Here is the screen shot of that:

Finally the third effect is a reverb again by Kjaerhus Audio namely the Classic Reverb. BTW, the “Classic” series is a set of free , yes free and excellent VST plugins.

Check out the mp3. Its a very basic bass riff that is repeated over a BFD latin drum groove but it should get the point across as far as to the sound of the bass. It is also bass riff to one of my original tunes Maldezar.
I have started a discussion on creating bass tones on my forum.

Reaper is an incredibly powerful Windows DAW, which is as increidibly affordable at a price of $39.00 and which has a very active if not passionate community behind it. I bumped into Reaper because my usual DAW Adobe Audition does not have VSTi support. VSTi support means being able to load virtual instruments not to be confused with virtual effects which it can indeed do. There are many more reasons than just VSTi support to contemplate using Reaper. It is really a powerful multitrack recorder with very flexible signal routing capabilities. It also comes with a ton of free effects which seem to be very well liked within the community. Reaper does not have in my estimation the editing tools that Audition has. My guess is that I will be using both tools with Reaper being used for the intial multitrack recording to initial mixes and Audition in the final mixing and mastering process.
Some of Reaper’s features:
and more well worth checking it out. Don’t let the prize fool you Reaper in many ways is just as powerful as any of the other well known DAWs such as Cubase and ProTools. It may well be exactly what you need.