Monthly Archives: March 2007

Calibrating for Latency

Calibrating your DAW for latency is an increidibly important first step not to be forgotten. Depending on your audio interface and computer setup the latency i.e. delay between what you play and what is recorded can be significant. Furthermore, if you are not aware of the issue it can really be disconcerting since it will seem like you have timing issues.

On Windows reduced latency is achieved by using ASIO drivers. Once you have an ASIO driver installed the next step is to determine what the lowest buffer setting is where your interface still operates normally. Abnormal operation is discernible due to audible pops, clicks and glitches. The lower your buffer setting the lower your latency but having low latency is still not enough with regards to recording. The goal is to actually “zero off” latency i.e. calibrate your DAW so that an a sample size offset is specified so that there is no latency at all.

So how do you do that? Well, you conduct an experiment which is known as a loop back test. I learned about how to set this up from a thread I started at the Reaper forum.

These are the steps:

  1. Find a sample audio material such as a click track or very simple drum loop.
  2. Set the master output of your daw to a specific out on your audio interface . say Out # 1.
  3. Arm a track for recording and set its input to a specific input on your audio interface , say In#1
  4. Physically connect with a patch cable the on your audio interface Out #1 to In #1.
  5. Record a few seconds of the material.
  6. Use an audio editor to find the crest of a discernible piece of audio on your original drum loop. Make sure that timeline on your DAW is set to show samples and note what sample the crest resides. See figure above.
  7. Do the same for the recorded material.
  8. Determine the difference in samples between the original material and the recorded material. This is your offset.
  9. Add the offset to your DAW’s preference settings for latency offset.
  10. Repeat the experiment making sure that the offset has been applied and saved to your preferences.
  11. Confirm that the second time around that the original material and the recorded material line up perfectly.

If using Reaper there’s a project file availble in the thread I have a link for above. The thread has some interesting discussions on latency and is a good read. Check it out.
Layla DiMeola

Just found out that my favorite guitarist’s wife is becoming active about her own artistic passions. I’m referring to Layla DiMeola which is married to the great guitarist Al Di Meola.

The pic above was borrowed sample of her artwork from her website.

Keep in tune.

Putting down that Bass #1


Here is one I hope of many experiments that I will share in making the right bass sound for whatever the occassion may be.

First of all, I started by using the Pandora PX4D and specifically the Slap Bass patch. I made sure to remove any effects processing since I was going to be doing that on my DAW i.e. Reaper in this case.

As far as to the effects the first VST effect I used was a guitar effect the RedNefTwin from SimulAnalog. Here is a screen shot of the settings used:

The second effect is the free Classic Compressor by Kjaerhus Audio. Here is the screen shot of that:

Finally the third effect is a reverb again by Kjaerhus Audio namely the Classic Reverb. BTW, the “Classic” series is a set of free , yes free and excellent VST plugins.

Check out the mp3. Its a very basic bass riff that is repeated over a BFD latin drum groove but it should get the point across as far as to the sound of the bass. It is also bass riff to one of my original tunes Maldezar.

I have started a discussion on creating bass tones on my forum.

Are you a Studio Pack Rat?

I plead guilty. I’m also a gear junkie and the combination can be deadly. A pack rat is annoying but in the studio it can be counter productive. The more my setup goes virtual in the studio the more I see gear becoming irrelevant I also recently decided to condense my guitar/ synth setup around the newly released next evolution of Roland’s VG line namely the VG-99.

Here is a list of gear that I am getting rid of:

  1. Roland GR-20s
  2. Line 6 PodXT
  3. DBX 163X Compressor
  4. Zoom RT-323 Drum machine
  5. Alesis Microverb III
  6. Rocktron Intelliflex LTD
  7. Alesis Midiverb III
  8. MOTU MicroExpress MIDI interface
  9. MOTU 2408 mII Firewire Audio Interface
  10. AKG 330 BT Cardiod Microphone

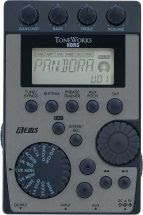
The GR-20s and the PodXT are being replaced by the VG-99. Mind you I do have a Sansamp PSA-1 and that I will always keep. I also have a couple very handy , portable Korg Pandora’s for the acoustic guitars, electric and bass.

The DBX 163x is a great soft knee compressor but last year I purchased a Focusrite Trakmaster Pro which is just more versatile.

The Zoom drum machine again great drum machine but I decided to go virtual with the drums. I’m using the BFD virtual drum kit and to play live into I will be purchasing an M-Audio Trigger Finger.

The Rocktron Intelliflex is a great guitar effects processor i.e. its just effects but very high quality but again the VG-99 has all of that. The other effects units basically replaced by the fact that most of my needs are handled by virtual plugins. No , I am not gigging but I suspect that if I was that the VG-99 should do me well.

The MOTU are legacy units from the days I was running a MAC although they do have drivers for Windows. However, I had decided to go with Edirol, a subsidiary of Roland and which is a company that targets Windows. Specifically my DAC is a firewire Edirol FA-101, great unit, very portable at a half rack size. It provides for 10 in and 10 outs , certainly more than I project I will ever need.

The AKG Mic is really more of a live mic than a recording mic. For recording I’m using a Rode NT-1 omni condenser mic. So far very good results in recording my Ovation’s “presence” in my studio.

Every piece of gear represents a knowledge skill set that must be obtained and maintained. Fine tuning your studio gear to do what you need to do helps focus and therefore productivity.

I started a thread on my forum on the importance of one’s studio setup, so if you care please join our group and let us know what you think. Here is the link to the thread:

http://www.monteirosfusion.com/forum/index.php?topic=23.0

Reaper

Reaper is an incredibly powerful Windows DAW, which is as increidibly affordable at a price of $39.00 and which has a very active if not passionate community behind it. I bumped into Reaper because my usual DAW Adobe Audition does not have VSTi support. VSTi support means being able to load virtual instruments not to be confused with virtual effects which it can indeed do. There are many more reasons than just VSTi support to contemplate using Reaper. It is really a powerful multitrack recorder with very flexible signal routing capabilities. It also comes with a ton of free effects which seem to be very well liked within the community. Reaper does not have in my estimation the editing tools that Audition has. My guess is that I will be using both tools with Reaper being used for the intial multitrack recording to initial mixes and Audition in the final mixing and mastering process.

Some of Reaper’s features:

  • Portable – supports running from USB keys or other removable media
  • 64 bit audio engine
  • Excellent low-latency performance
  • Multiprocessor capable
  • Direct multi-track recording to many formats including WAV/BWF/W64, AIFF, WavPack, FLAC, OGG, and MIDI.
  • Extremely flexible routing
  • Fast, tool-less editing
  • Supports a wide range of hardware (nearly any audio interface, outboard hardware, many control surfaces)
  • Support for VST, VSTi, DX, DXi effects
  • ReaPlugs: high quality 64 bit effect suite
  • Tightly coded – installer is just over 2MB
  • ool-less mouse interface — spend less time clicking
  • Drag and drop files to instantly import them into a project
  • Support for mixing any combination of file type/samplerate/bit depth on each track
  • Easily split, move, and resize items
  • Each item has easily manipulated fades and volume
  • Tab to transient support
  • Configurable and editable automatic crossfading of overlapping items
  • Per-item pitch shift and time stretch
  • Arbitrary item grouping
  • Markers and envelopes can be moved in logical sync with editing operations
  • Ripple editing – moving/deletion of items can optionally affect later items
  • Multiple tempos and time signatures per project
  • Ability to define and edit project via regions
  • Automation envelopes

  • and more well worth checking it out. Don’t let the prize fool you Reaper in many ways is just as powerful as any of the other well known DAWs such as Cubase and ProTools. It may well be exactly what you need.

    Self Reliance

    Self reliance means taking the ultimate responsibility for the success of your project. Dependencies on other individuals create vulnerabilities which can derail your project. Its nobody’s fault but yours. One must therefore strive for control. The first objective of is to control the scope of your project i.e. define what success is. Can you do what you are setting out to do? In the context of music this can be an easy objective if your goal is one of self expression. Do you have enough technical and compositional skills to be able to express your musical thoughts to your satisfaction? If your goals in music are not about money, not about public accolades but about WHAT you want to say then defining the project is done. The rest is just hard work.

    To be more concrete in the context of modern music “self publication” there are some specific things one can do. This is where I start talking about what I can do to be self reliant. I can think of 3 main areas:

    • Composition
    • Playing the Parts
    • Audio Engineering


    Composition

    To be self reliant here involves learning about the music craft and some of its rules. It also means not being tied by its rules or certain interpretations of said rules. Self reliance is built through experimentation and the courage to finish something regardless of the emotional suffering. Don’t wait for others to tell you what they think. What do you think?


    Playing the Parts

    Tunes consist of multiple parts , all doing their part. Its that cooperation that makes music breathe. We are living in a day and age that making those parts happen is very do-able. Technology here has been the great enabler. Very viable drum parts can be generated via software like BFD. Equipment like the M-audio Trigger finger make it possible even for non-drummers to add the percussive icing that can make such a great difference in a tune. Synthesisers make it possible for keyboardists and guitar players to play a multitude of sounds. If you are a guitar player you should play your own bass parts on a bass guitar. Keyboard players have their left hand. Sequencing can be a viable mechanism for adding further orchestration. Here is the main point don’t stop finishing your tune just because you don’t have a bass player or drummer around. Just do it. You can always later collaborate. 

    This brings me to an important point with regards to collaboration. Be sure you are ready to collaborate. Don’t rely on anybody understanding your vision for your project nevermind your vision for a particular tune. Make that vision as concrete as possible by having something finished to show. You have to have something to polish , you can’t polish smoke.


    Audio Engineering

    Product means a CD and to get there one needs to put things down on tape or rather on a hard drive. Again, don’t rely on anybody. There is so much out there nowadays to help with this. Sound recording has indeed become accessible to the masses. Inexpensive powerful software is there and with these new Core 2 Duo Cores there is not much that one cannot do. Secondly, there are some great communities of like minded individuals that are invaluable resources.


    Publishing independent music by independent musicians is today attainable by those that really want it. Success is achieved by building self – reliance and accepting full responsibility for the success of the project. Dependency on other individuals is relinquishing responsibility which has the potential outcome of derailing you of the path to the release of your CD.